Membuka Aplikasi GIMP

Pilih File – Open

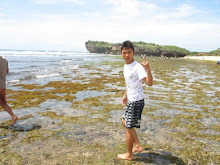
Masukan Gambar


Maka akan menjadi

Pilih – Light and Shadow – Lens Flare

Maka akan menjadi

Buka gambar aslinya lalu Pilih Filter – Combine - Filmstrip

Pada menu filmstrip tambahkan foto yang telah di edit
Maka akan menjadi

Beri Nama dengan mengaktifkan Huruf A Yang ada di ToolBox